A Classic Little Recipe that Popped Over There

Yorkshire Pudding

As the time for long, lazy, Sunday lunch barbecues in the garden looks to be coming to an end, for this year at least, I thought I would publish a couple of recipes to polish up your classic roast to chef like standards. What can be more symbolic of Sunday lunch than the Yorkshire Pudding, the traditional accompaniment alongside roast potatoes, parsnips and spicy, hot English mustard to a hunk of rare roast beef. You can find this most English of dishes cooked around the world, where ever a few expatriates gather together, but I am always surprised to find Yorkshire Puddings, albeit under another name, over in the USA.

Let’s call Yorkshire pudding
A fortunate blunder:
It’s a sort of popover
That turned and popped under.

Ogden Nash

Of the Yorkshire pudding it has been said, it can only successfully be made by someone from that most august county of England. Grand, my mum is from Yorkshire and makes wonderful Yorkies and perhaps the skill is inherited because I am pretty proud of most of my attempts. A Yorkshire Pudding is made from a milk, egg and flour batter, which was originally poured into a tin set under the roasting joint. The pudding cooked in the hot meat fat and absorbed any juices from the roast. A large slice was served to each dinner with meat gravy before the main course. The meat and vegetables then followed, usually served with a parsley or white onion sauce.

In 1747 in ‘ The Art of Cookery made Plain and Easy ‘ by Hannah Glasse, one of the first English, famous female cookery writers, there is a recipe for Yorkshire pudding. This is the first time a batter or dripping pudding is recorded with the name, although a flatter less aerated dish had been cooked for many years previously. Traditionally any left over pudding could be eaten as a dessert with sugar and perhaps orange juice.

The Yorkshire pudding recipe popped over to America ( excuse the pun ) and the first recipe for a Popover is recorded in ‘ Practical Cooking ‘ published in 1876 by M. N. Henderson. Popovers may be served either as a sweet, topped with fruit and whipped cream for breakfast or with afternoon tea, and with roasted meats at lunch and dinner. Popovers tend to be individually baked in muffin tins and often include herbs or garlic in the recipe. Another popular variation replaced some of the flour in the batter mix with pumpkin purée. The name Popover is thought to come from the fact that the cooked batter swells or pops over the top of the baking tin.

In 2008 the Royal Society of Chemistry held a competition, carried out to create a vouch safe Yorkshire Pudding recipe and somewhat arbitrarily decided that a true Yorkshire Pudding cannot be less than four inches tall. They examined the effects of temperature, ingredients and even altitude in the search for perfection. My knowledge of chemistry is limited to an ancient ‘ O ‘ level but quite simply the heat causes the two raising agents, the egg and beaten in air, to expand the batter mix. My tips for success are simple are make sure all the ingredients are at room temperature and get the fat in your baking tray smoking hot. There I have shared the secret and that is because as they say in Yorkshire ‘ I’m a reight gud sooart ‘.

Individual Yorkshire puddings can be cooked after your joint while it is resting before carving.

Perfect Yorkshire Puddings

90 gr Plain Flour

1 fresh Egg

Around 250 ml half full fat Milk / half Water

¼ teaspoon Salt

A good pinch of freshly ground White Pepper.

1-2 tablespoon of good Beef Dripping.

Preheat your oven to 220C/425F/Gas mark 7. Place a damp cloth on your work surface to stop your mixing bowl slipping and place the bowl on top. Sieve the flour, pepper and salt into your bowl, make a well in the middle and add the egg. Start to beat together then gradually add the milk / water. Continue adding the milk/ water until the batter is smooth and the consistency of pouring cream. Leave the mixture to stand for ten minutes. While the mixture stands, divide the beef dripping into Yorkshire Pudding tins and place the tins in the oven until the fat starts to smoke. Give the batter a final stir and pour quickly into the tins. Put them back in the oven and cook until well risen and golden brown, this will take about fifteen to twenty five minutes depending on the size of your tin.


For the full Royal Society of Chemistry press release

Frost Takes The #AveenoSkincareSecrets Challenge

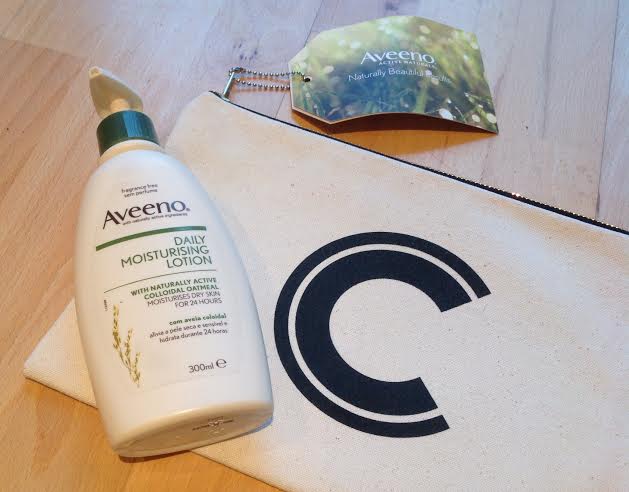
aveenoI was delighted to be asked to take part in the #AveenoSkincareSecrets blogger tag challenge. I love sharing my skincare secrets and reading up on how other people look so fabulous. I received some AVEENO Daily Moisturising Lotion to review and a beautiful, personalised bag. Here is how I got on.

First of all, the AVEENO Daily Moisturising Lotion is light and sinks in beautifully. It feels really nice. After I have applied my skin looks like it is glowing and is very soft. I use it daily and my dry skin clears up and my skin glows. I am completely converted and will be buying it in the future. AVEENO Daily Moisturising Lotion is a non-greasy lotion and is clinically proven to significantly improve the condition of dry skin from day one. It is fragrance free and will keep your skin feeling beautifully moisturised and nourished for 24 hours.

It is available in two sizes:

200ml RRP: £5.10

300ml RRP: £7.14


THE BENEFITS OF OATS IN SKINCARE


  • Increase skin hydration: helps to restore and protect the skin’s
  • natural barrier helping to prevent water loss and maintain moisture
  • Soothes: oatmeal is known for its soothing benefits on sensitive skin
  • Cleanses: the oat particles adhere to dirt and dead skin cells allowing
  • them to be washed away
  • Protects: creates a protective film on the surface of the skin
  • Buffers: helps return skin to normal pH levels


Now for my skincare secrets. I may have now crept into my thirties but people say I look younger. Here they are:

Always use SPF. Use sun lotion of at least SPF 15. Even in winter.

Stay hydrated. You don’t have to drink loads of water but make sure you stay hydrated.

Eat your five a day. Eat as healthily as possible.

Use good products. They don’t have to be super expensive.  AVEENO Daily Moisturising Lotion is reasonably priced and brilliant.


Right, there is my #AveenoSkincareSecrets. Share yours using the hashtag. I also tag the amazing Jess from http://www.lookwhatigot.co.uk to share her skincare secrets.


http://www.aveeno.co.uk/

https://www.facebook.com/AveenoUK


Sponsored Post. 


Nu Skin Galvanic Spa Review

I have used the Nu Skin Galvanic Spa for the last 4 weeks and it has really changed my skin for the better. At the cost of 2 professional salon visits it’s well worth the hype. I now can see amazing results in the comfort of my own bathroom. It’s lifted my jaw line. My cheeks, around my mouth and eyes have really been smoothed out. Also my pores actually look like I have spent a fortune on weekly treatments. The fine lines are around my eyes have all but vanished. it looks like I have expensive spa visits. It’s a little like ironing out the skin. The more you use this device the better the results. What’s great about this is that I found it actually works much like a professional Galvanic machine. These work by sending a current through the skin and enable products to be penetrated deeper into the underlying cells. And also to cleanse the skin to allow the new podcast to be introduced. It will create a slight metallic taste, this is completely normal and professional services do just the same.

Nu Skin Galvanic Spa Review
I use the Nu Skin Galvanic Spa (incredible little gadget) around 3 times a week for 5 minutes a time for each gel stage that comes with the kit. I just pop it into my regular nighttime routine and I’m sorted.

Nu Skin Galvanic Spa Routine

  1. I take off my makeup with an oil based lotion. This will get rid of stubborn eye makeup and daily build up of London life.
  2. I then cleanse with my skin with Caudilie facial foam. I will do a full review of this very soon!
  3. I then chop off the end of the pre gel treatment and apply 1/2 of the tube all over my face.
  4. Then I damp my hand under the tap and place my fingers on the metal pad at the back.
  5. Turn on the machine to No1 and start to gently use upward motions, a bit like a facial massage. You will hear the machine beep and this tells you its working.
  6. I do this for about 2 1/2 minutes then move onto the other side. This stage is the deep cleansing stage where its having a souphficaton effect. This means its turning the grease and grime into a soap like substance that can be washed off.
  7. Then it time for the treatment mode No2. Cut open the treatment tube and add 1/2 to the entire face and just repeat the movements from before.
  8. If I am doing my weekly mask I would apply this now for about 10- 20 mins while relaxing in the bath.
  9. I then lightly remove any excess and apply a pea sized amount of Nu Skin night cream.
  10. I always follow this with my Hydropeptide eye cream! Check out my article here on some other incredible products.

Nu Skin Galvanic Spa Review


When I used the Nu Skin Galvanic Spa for the first time I decided to do just one side of my face! It’s truly amazing and I suggest if you purchase this bathroom anti ageing buddy that you do the same!! I get told all the time that I have amazing skin and regularly get asked for ID! I think this really has helped loads over the last few weeks as my skin hasn’t looked this great in months.

Once the skin has gone too far with the ageing process we can only maintain what we have. Their is no miracle cure and its all down to upkeep. You need to know that the effectiveness of expensive salon facial electrical treatments are not miracle workers but they will assist to help keep the skin in good condition. But also you need to have regular treatments going forward or the effects will be lost and your money just wasted. I have had this little device for over 6 months and annoyed I didn’t start using it sooner. I am now converted and happy to have this little baby sitting on its stand taking pride and place on my vanity unit!

Head over to their website for more information HERE. 

Follow me on Twitter HERE

Check out my blog HERE! 

And for any Photography or information regarding images please check out 2boxes.co.uk 

Top 10 Tips On How To Look Amazing In Pictures

Here is my definitive advice to all of you wanting to get amazing images every time no matter what. It’s all about angles and lighting. Here I will share with you a my top tips.

This will help you when you need a go to quick fire list to remind you. I have been a photographer for many years and grew up in a house with a darkroom and studio. My father was a photographer and artist. My mother was a model, so you can see where I get the passion for fashion, style and photography from.

Along with my main job as session nail technician, its all about creating amazing images. My desire to write for you guys comes from a need to help others. Be it beauty advice, great recipes or fashion and style inspiration. Its also a little photography outlet for myself and my husband. All the articles I write need pictures and what better way to get creative than set up little shoots for each and every one!

How To Look Good In Pictures

Top tips on how to look amazing in pictures.


  1. 1. Wear clothing that you feel amazing in. If you know your going out and having tons of pictures taken throughout the day or night its important to feel good from various angles. If you hate your upper arms then wear a dress that hides the tops of the arms. You will instantly feel more confident. Or failing that dash out and purchase MAC Face & Body. Most makeup artists I work with use this for runway shows, magazine shoots and editorials. I own a fair few bottles in different shades and its my best buddy if my arms are looking a little blotchy or pasty. Our secret ok!
  2. Invest in the best underwear. Tight and ill-fitting garments just look terrible, especially if shot from behind. Purchase t-shirt bras and seam free pants. Nude is always best in my book. Yes I do own rather a lot of Bridget style pants and I’m not ashamed to admit it.
  3. Don’t use a flash. Natural lighting is always best. I totally hate flash photography when done the wrong way. It can make makeup and clothing look terrible, whats worse.. when food is involved. Don’t do it…Whenever I ever see that dreaded flash go off snapping a beautiful plate of food I die inside just a little every time!! Turn it off and see how it looks. Yes I know there are times when your in a dark restaurant…Then that is telling you its not appropriate. If you really need to snap your food, then go out mid afternoon!
  4. Cloudy days are actually perfect for portrait photography as the sky has a natural light diffuser.
  5. Always turn to your side as this will create a softer prettier look for us girlies. If you need to lift an arm and place it on a hip do so.
  6. Use sunglasses, bags or a hat if you don’t know what to do with your hands.
  7. Practice posing in the mirror. It sounds narcissistic but it will help you the more that you do it.
  8. Always wear heels as this will create confidence.
  9. If you are having your picture taken from the front tuck your arms into your sides as this will create a longer leaner frame.
  10. Lastly Smile. Even if your not looking at the camera. You might look a little crazy but when the images come through you will look radiant and stunning.

5 Sizzling Steak Tips

5thingsyouneedtoknowaboutsteakHaving ‘grilled’ one of England’s top top beef scientists, we bring you tips that will make your barbecue season so much tastier. ‘The Science of Steak’ at The Meridian Hotel in London’s Piccadily involved some serious steak sampling, and whilst munching on  Waygu and Aberdeen Angus, Carol Muskoron spoke to Dr Phil Hadley of the Agriculture and Horticulture Development Board to discover some compelling steak advice.

Why you don’t always need steak mince.

Do you walk proudly by the budget mince and head straight for the steak mince? Budget mince is the best mince for making burgers. With more fat than leaner mince, it gives a burger extra flavour and succulence and helps it hold together better too. Go for the mid-range mince if you like a little less fat, but you really don’t need to opt for steak mince if you’re making burgers. What should you use steak mince for? Lasagne or spaghetti bolognese of course.

Steak doesn’t have to be bright red when you buy it

You know those brownish, vacuum-packed steaks you tend to avoid in the supermarkets – well, it turns out that they’re just as fresh as the bright red ones. We might prefer our steak to look red and bloody when we buy it, but it makes no difference to the steak at all. Want proof? Take it out of its pack and leave it for half an hour and it will turn nice and red again once its re-oxygenated. Or just cook it – the colour won’t affect the flavour.

When NOT to throw out your steak

If your steak has turned a bit brown on the outside that doesn’t necessarily mean it’s off. Steak does brown as it gets older but it’s usually perfectly okay to cook a steak that has a brown tinge. And remember, if you’re pan-frying or barbecuing you’ll be heating it up so high that it will kill any small amounts of bacteria on the outside. The sell-by date is a good indicator of freshness but may not be accurate – the real test is to smell it. A steak that is off will make its presence known to your nostrils – it will smell bad!

Ageing – what’s that all about?

When you go to a restaurant and 35-day aged steak is on the menu, what does that mean? Should you be excited or horrified that a mouldy old lump of meat will turn up on your plate?!  Ageing simply means storing meat so that the flavours and tenderness improve – it’s kept in a constant and very cool temperature under UV light to keep it fresh during the process. It’s common practice to age steak for 14 days, as flavour and texture both improve up to that point. After 14 days the texture won’t improve any more – it’s as tender as it’s going to get – but the flavour will move on and become more meaty (more game-like).

Grain-fed or grass fed?

Again, on a menu or in a butcher’s you might see this information. What should you make of it? In England, most of our cattle is grass fed, and the English consumer seems to mostly prefer grass-fed steak. In taste tests we say grain-fed steaks taste fattier. But give an American a grass-fed steak and they may well complain that it tastes off! Really, this seems to be a case of liking what you’re used to. FYI: Argentinian steaks are grass fed – and that may well be why so many of us love our Argentinian steak restaurants here in the UK.

Fnd out more at http://www.simplybeefandlamb.co.uk.


Learning To Listen To Your Body

Recently I came down with a bout of stress related illness and I beat myself up over having time off. I felt like I was letting everyone down. Now we all get sick and we can’t help it. When it happens we all need to listen to our bodies and just go with it. It’s harder said than done learning to listen to your body and not push yourself so hard. I’m the worst for this as I will try to everything. Work full time, commute an hour to and from work, do photography at the weekends and evenings then edit those pictures and schedule articles on my days off. When I tell people what my week is like the response is always “How the heck do you do it all” In truth I have no idea. So it would make sense that my body sent me a persuasive little message. Sarah just stop….Slow down your not ever going to be a super hero. Stepping outside ones self and looking in as though you were a good friend is something we all need to do now and then.

Learning to Listen To Your Body-1

Reevaluating your life is a good thing. If you need some time off to recharge your energy then so be it.

My top 10 Tips For Listening To Your Body

1. Take a deep breath and take care of No1. Sometimes this is as important as looking after others.
2. Don’t stress out over the fact you can’t manage to do everything. These are what I have had to preach to myself over the last week!
3. Make a nice cup of tea, take a bath, get into clean pjs and get back in bed.
4. Turn off your phone when you get in from work or at 6pm
5. Don’t let others make you feel bad that you need to take care for yourself.
6. Learn to say NO.
8. Know your limits and don’t push yourself too hard.
9. Relax as stress builds up and can cause serious health problems.
10. Finally grab a good book and let your body really relax with out social media and drift off to sleep!

I believe it’s important for us to help others in life. If your feeling stressed out or poorly then learning to listen to your body can help with a lifetime of difficulties.

Top Ten eBay Tips

As you all will know I’m a fashion and style loving lass. When I need to save a few pennies for beauty products or a new camera my go to place is eBay. You can literally find a real hidden gem every day of you know how to search properly. Most of my friends call me the eBay Queen.

I will share with you my top ten eBay tips so you too can look stylish on a measly budget. Whether you missed out on that perfect little summer dress that sold out in a flash or just a tasty bargain waiting to be snapped up. These tips will help you look stylish and turn heads. Enable you to be a little individual but most importantly save you a packet!

Top 10 eBay Tips-5 Top 10 eBay Tips-5

1. Get the app on your smart phone. This way you will be able to look for things 24/7 if you so please.
2. Search for specific things or things that pop into your head. Or items you might have missed out on even years gone by. Like “Wit & Wisdom pink dress” I did this for a few months after longing to find one I didn’t purchase 15 years ago and it popped up for £3.50!
3. Be prepared to wait….ref to No2!
4. Haggle and contact sellers to see if they will take items out of auction. You might be surprised how many just want to get rid of unwanted items.
5. Set a budget each month and stick to it.
6. Watch items all the time as your iPhone or smartphone will let you know when they are coming to an end.
7. Refine settings, like price. Type in max price £1.00. Free postage or distance to you.
8. This brings me to the next tip, avoid overseas sellers that use descriptions like “May look different to image due to lighting” as you won’t end up with what you see!
9. This next tip is one my buddy Claire told me…Type in wrongly spelt terms like “Soze 8” as you will be amazed at how many items are listed spelt incorrectly!
10. Have fun with it. But don’t get too carried away!

Top 10 eBay Tips-5

I hope these little tips help you get a budget wardrobe just like mine!

Lansinoh 3-in-1 Breast Therapy Review

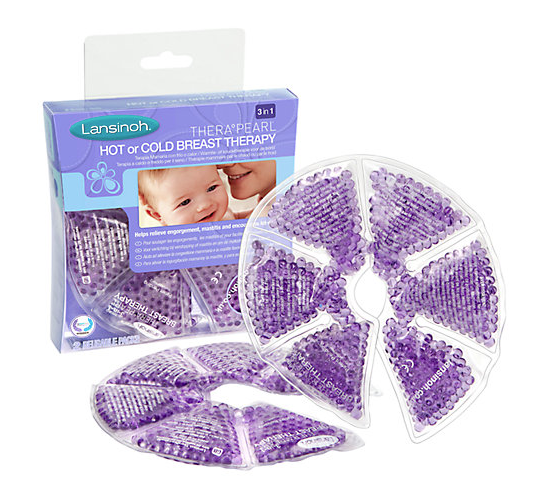
Lansinoh 3-in-1 Breast Therapy ReviewBreastfeeding is tough. No one really says just how hard it is, but even if you are lucky enough to take to it easily you may not be lucky enough to escape engorgement, mastitis, plugged ducts and sore nipples. Luckily there are things made to help, like Lansinoh’s 3-in-1 Breast Therapy. Is it any good? Let’s find out.

breastfeeding

The 3-in-1 Breast Therapy Packs use innovative PearlTechnology to deliver either heat or cold to affected areas of the breast. Chill it in the fridge or freezer for analgesic cold, or pop it in the microwave for penetrating heat and warmth. The pack holds its therapeutic temperature for a full 20 minutes so you get fast, effective relief.

The writer who reviewed this had mastitis and said that it really helped. Her doctor told her to use hot and cold compresses on her breasts and this treatment made it easy. They are convenient and because they can be both hot or cold they multi-task too. Perfect for saving money and space. No more cabbage on the breasts, this handy and effective treatment really works. It can also be used hot to reduce time spend pumping milk. Using it cold relieves engorgement and the hot therapy relieves mastitis and plugged ducts. Our writer says: ‘This is convenient and works well. It can be used for lots of different breastfeeding problems. It is a mum must have.’

mastitishelpbreastfeedinghelp

Lansinoh Therapearl 3-in-1 Breast Therapy Pack
RRP:£12.95
www.JohnLewis.co.uk

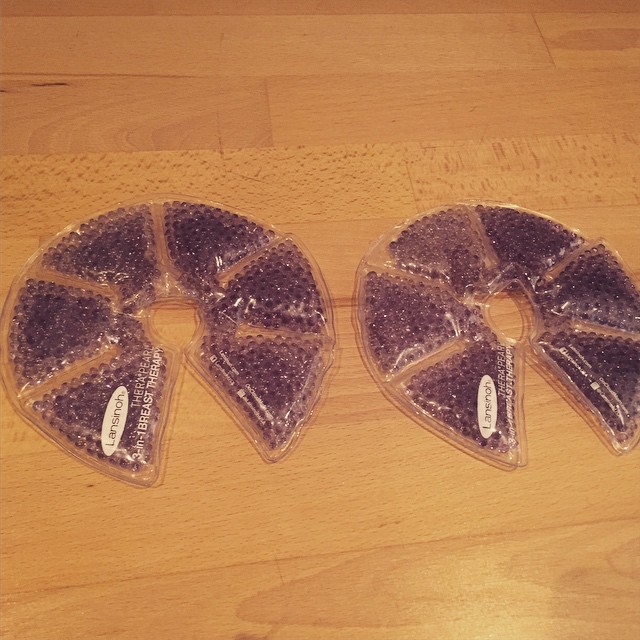
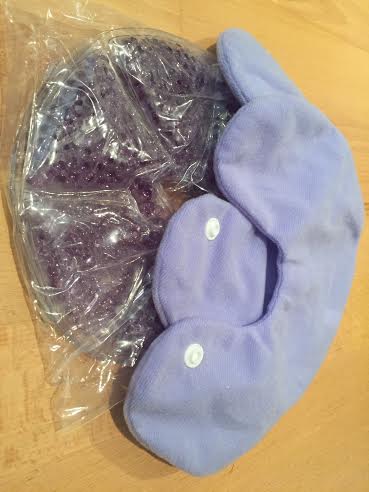
This innovative set includes two reusable treatment packs and covers that can be used hot or cold. The pearl design moulds to the breast to provide all-round relief when breastfeeding.